
The best tips for building your workflow
- Connecting blocks: Use lines, settings items (no spaces), and prompts {{previousblock}} for proper linking.
- Naming conventions: Use clear names, titles, and descriptions.
- Training templates: Provide 3-6 strong examples, split templates per prompt, and avoid using test data for training.
- Running workflows: Set the correct output (usually the last block) and ensure structured input.
- Iteration & testing: Test at least three times, refine, and explain steps as if training a colleague.
- Saving test data: Store data for reuse to avoid re-uploading.
- AI models: Use new models for critical tasks and older ones for simpler parts.
- Focus on repetitive work: this is the best to start working with Twin AI as you immediately get time saving results.
- Formatting: See the separate helpdesk article for layout tips.
- Support: Contact support@twinai.nl for help and refine workflows with the right questions.
Connecting blocks correctly in 3 ways
To ensure seamless execution, blocks must be properly connected. There are three main ways to link blocks:
- Using connection lines: Connect blocks visually with lines to establish a clear flow.
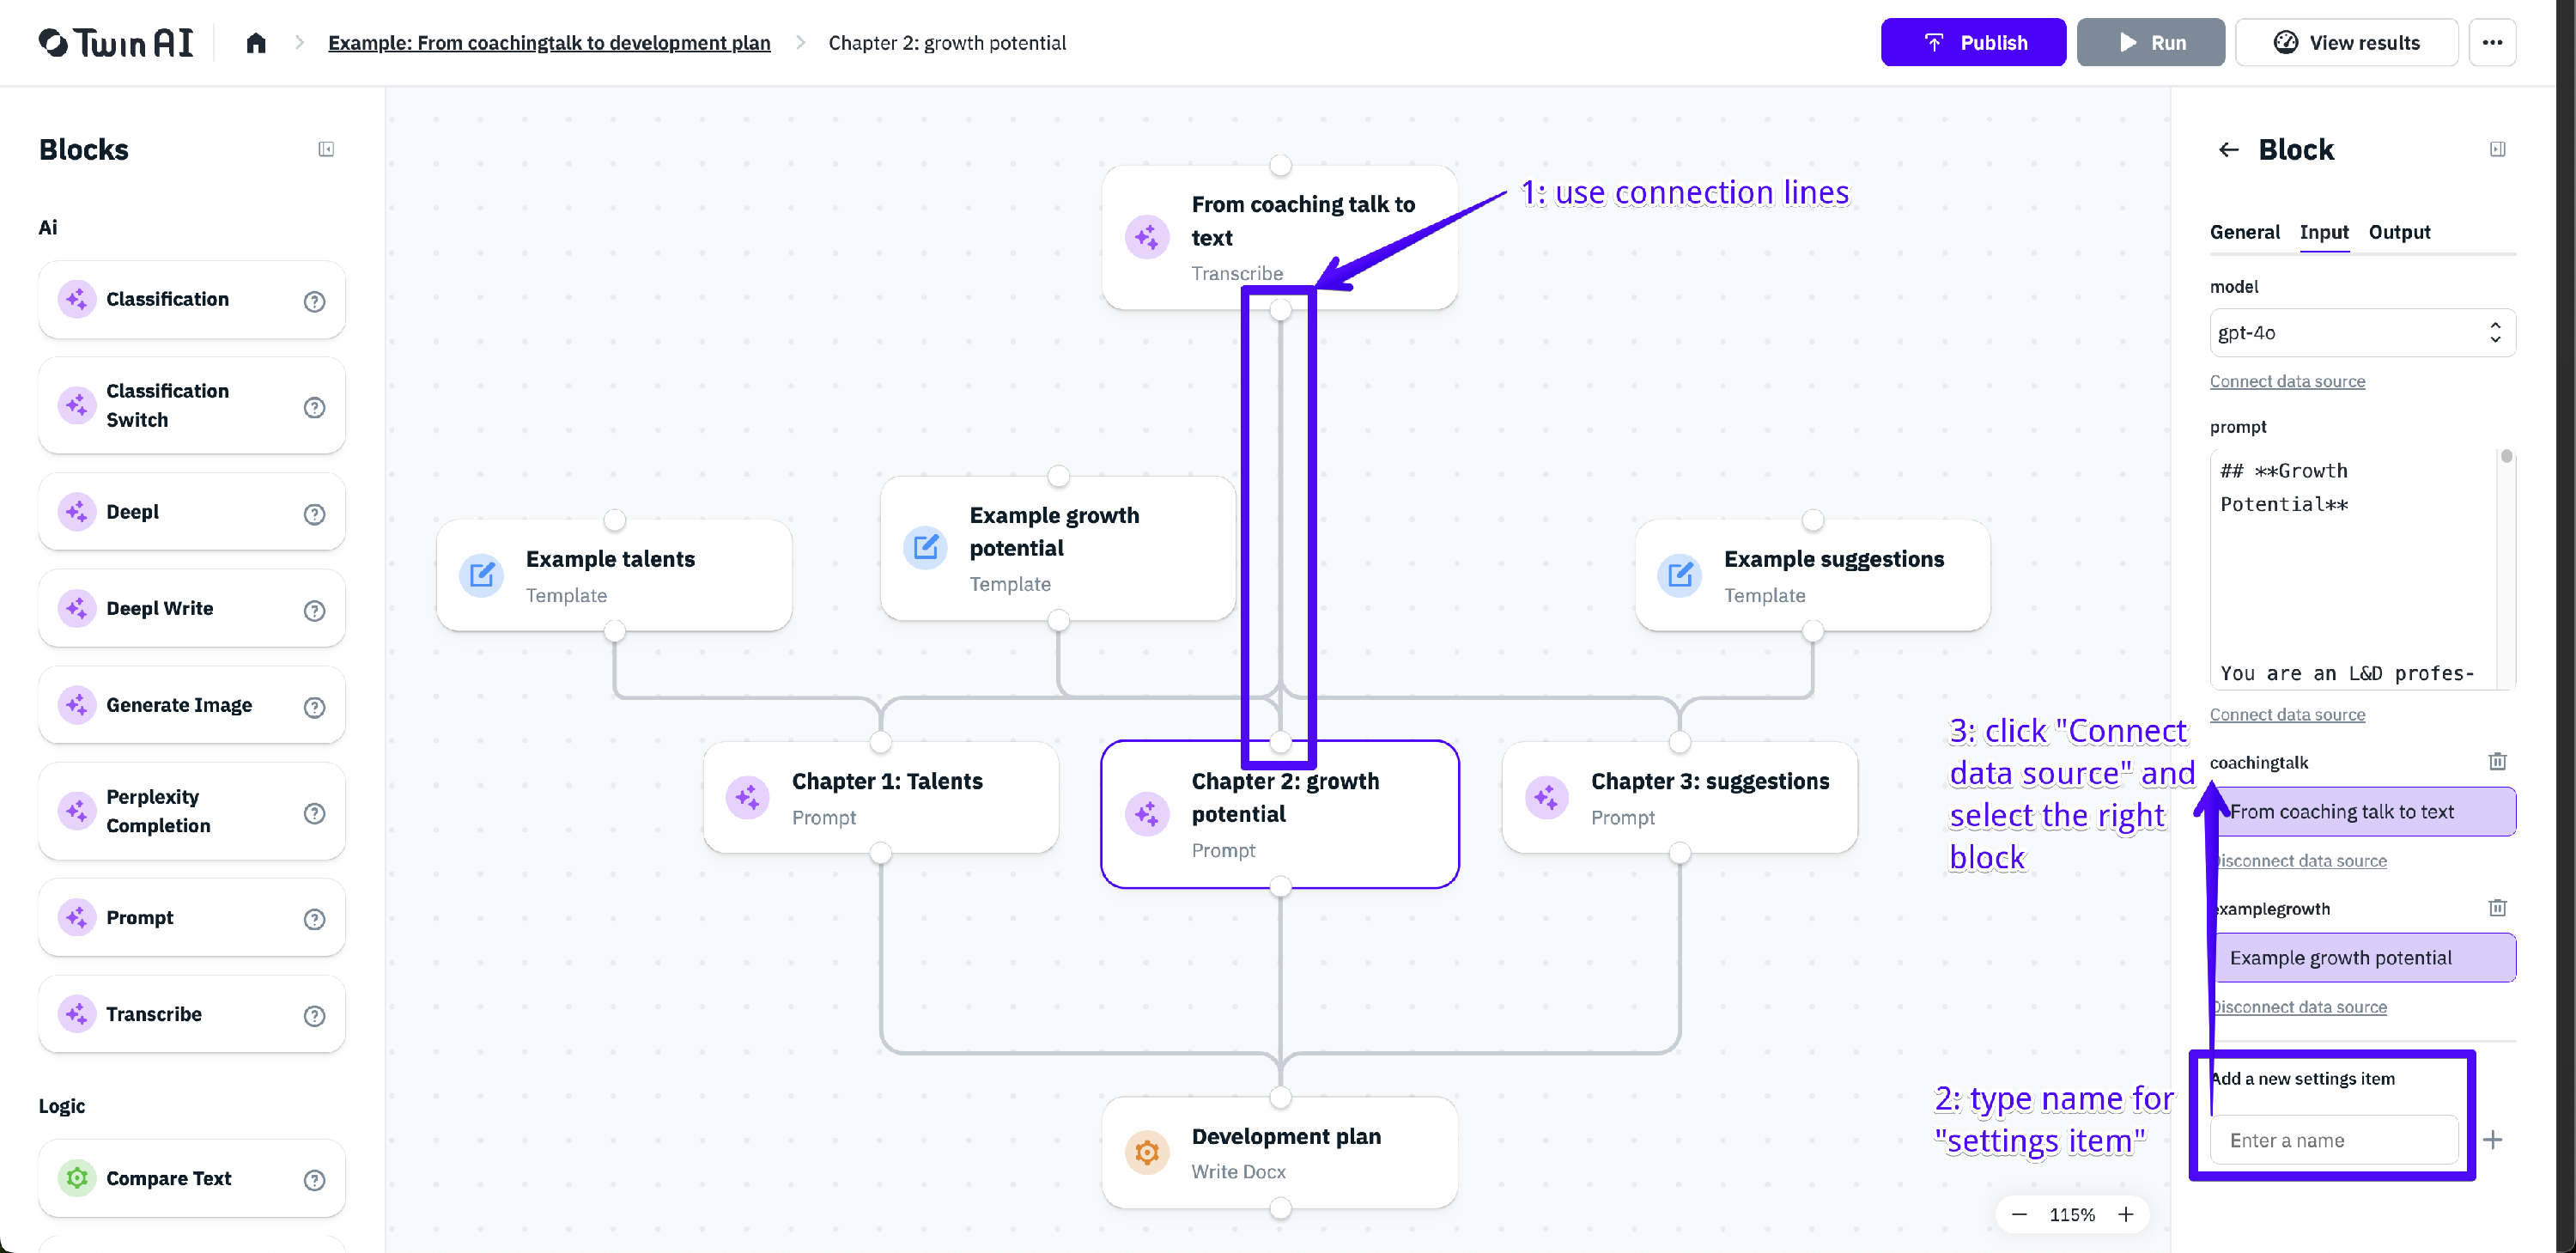
- Using settings items: When creating settings items, avoid spaces, as these can cause errors. Connect the blocks with each other using the settings items. Please see the screenshot below, step 2 and 3.
- Using prompts: Reference the previous block within a prompt by inserting
{{title-of-previous-block}}. The text between the brackets will turn grey if connected succesfully.
Properly connecting blocks ensures data flows logically and avoids disruptions in execution.

Naming conventions: clarity is key
- Give blocks and workflows clear and descriptive names.
- Add titles and descriptions to workflows to help colleagues understand their purpose.
- Consistent naming improves readability and usability, especially in collaborative environments.
- Refrain from using S p a c e s in the names of settings items. This is error sensitive.
Training your workflow with templates
Your workflow will improve significantly with high-quality training data:
- Provide 3 to 6 strong examples to train your workflow. Usually: the more, the better. Three high-quality examples outperform six mediocre ones.
- Connect the templates correctly by following the steps in this header: Connecting blocks correctly in 3 ways.
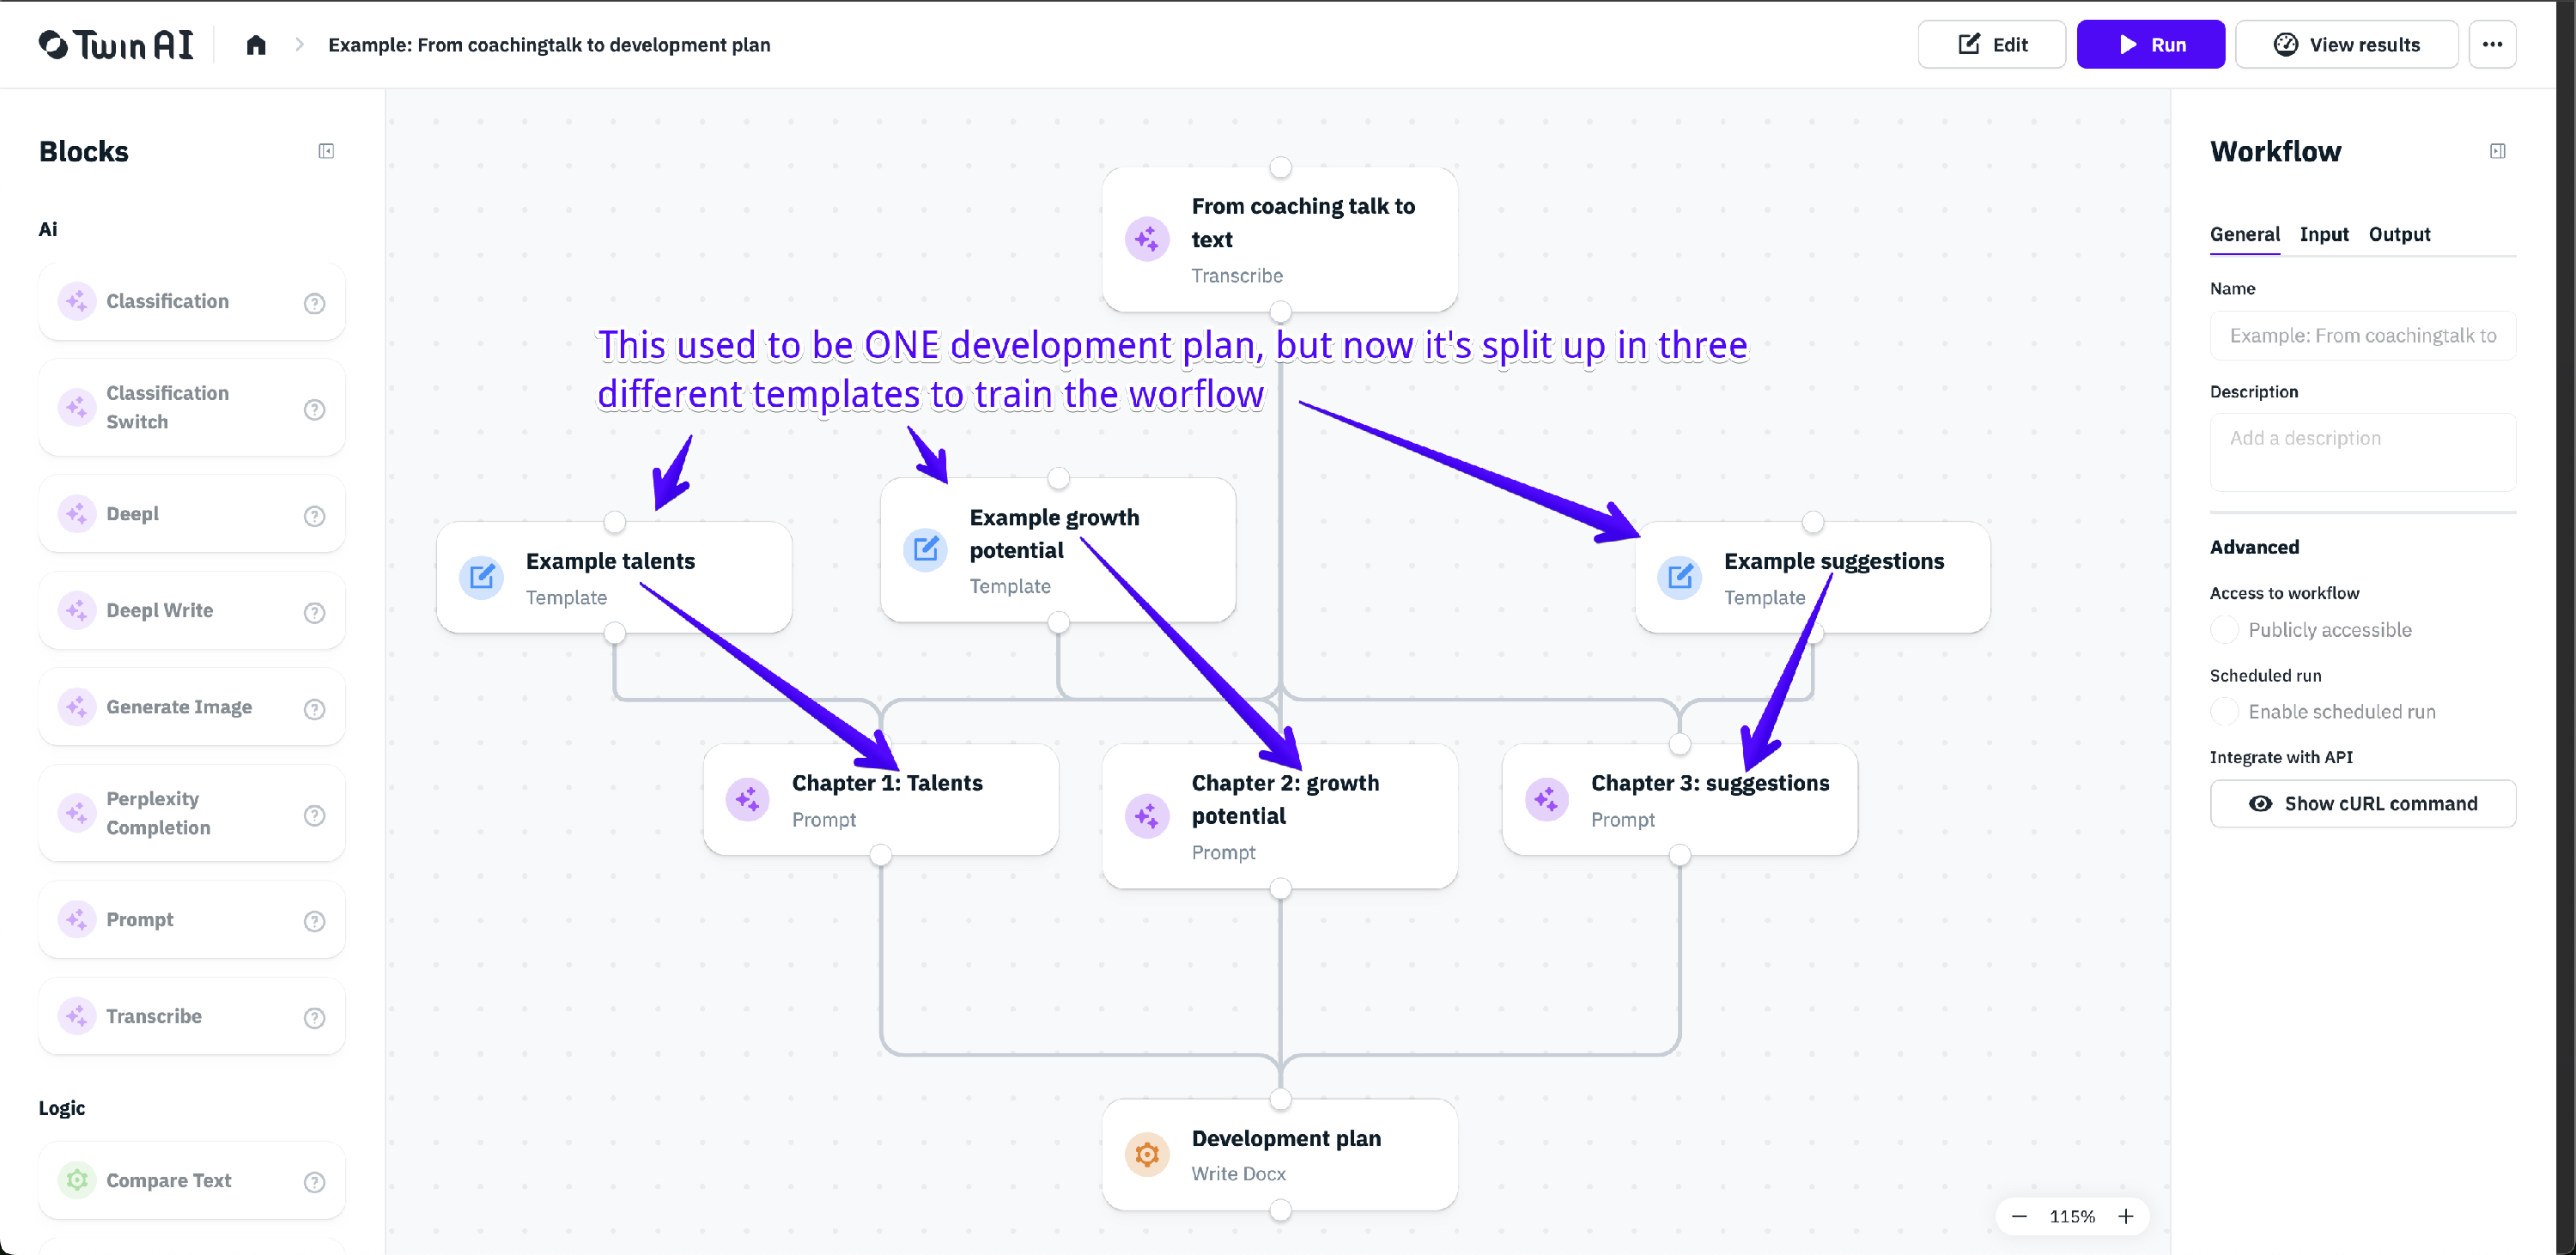
- Split your training data (your templates) to fit your prompt. So if your end result, and thus your template as well, contains 3 chapters, split it in 3 templates. Provide template 1 to prompt 1, template 2 to prompt 2 and template 3 to prompt 3. Please see the screenshot below. This way, your specific desired outcome (the template) will be used in the following prompt.
- Very important: avid using the same data for testing and training! If input of scenario A is used to test a workflow, test it with scenarios B, C, and D instead. Don't feed your workflow with the results of scenario A. Otherwise, the model will provide you with output very similar to scenario A.
- Make clear in your prompt that you have connected templates. Put something like this in your prompt:
The example templates below are intended solely as inspiration and a guideline for structure and formulation. Use these examples to understand the desired output, but do not copy the exact sentences or examples into your final report:
{{template1}}
{{template2}}
Selecting output & running workflows
- Click on the background of your workflow and set the correct output. This is usually the result of your last block.
- Remember: Better input = better output. Ensure the input is structured and clear for optimal results.
- Better prompting = better output.
Iteration & testing: the key to optimization
- Iterate, iterate, iterate. After building your workflow, run it, test it, and check the results. By checking the results you know where to refine. Do this at least three times, and refine where possible. It can be done more often depending on the complexity of your workflow.
- Think of building your workflow and writing a prompt as if you’re teaching a new colleague - explain every step clearly.
- There are three ways to view your output:
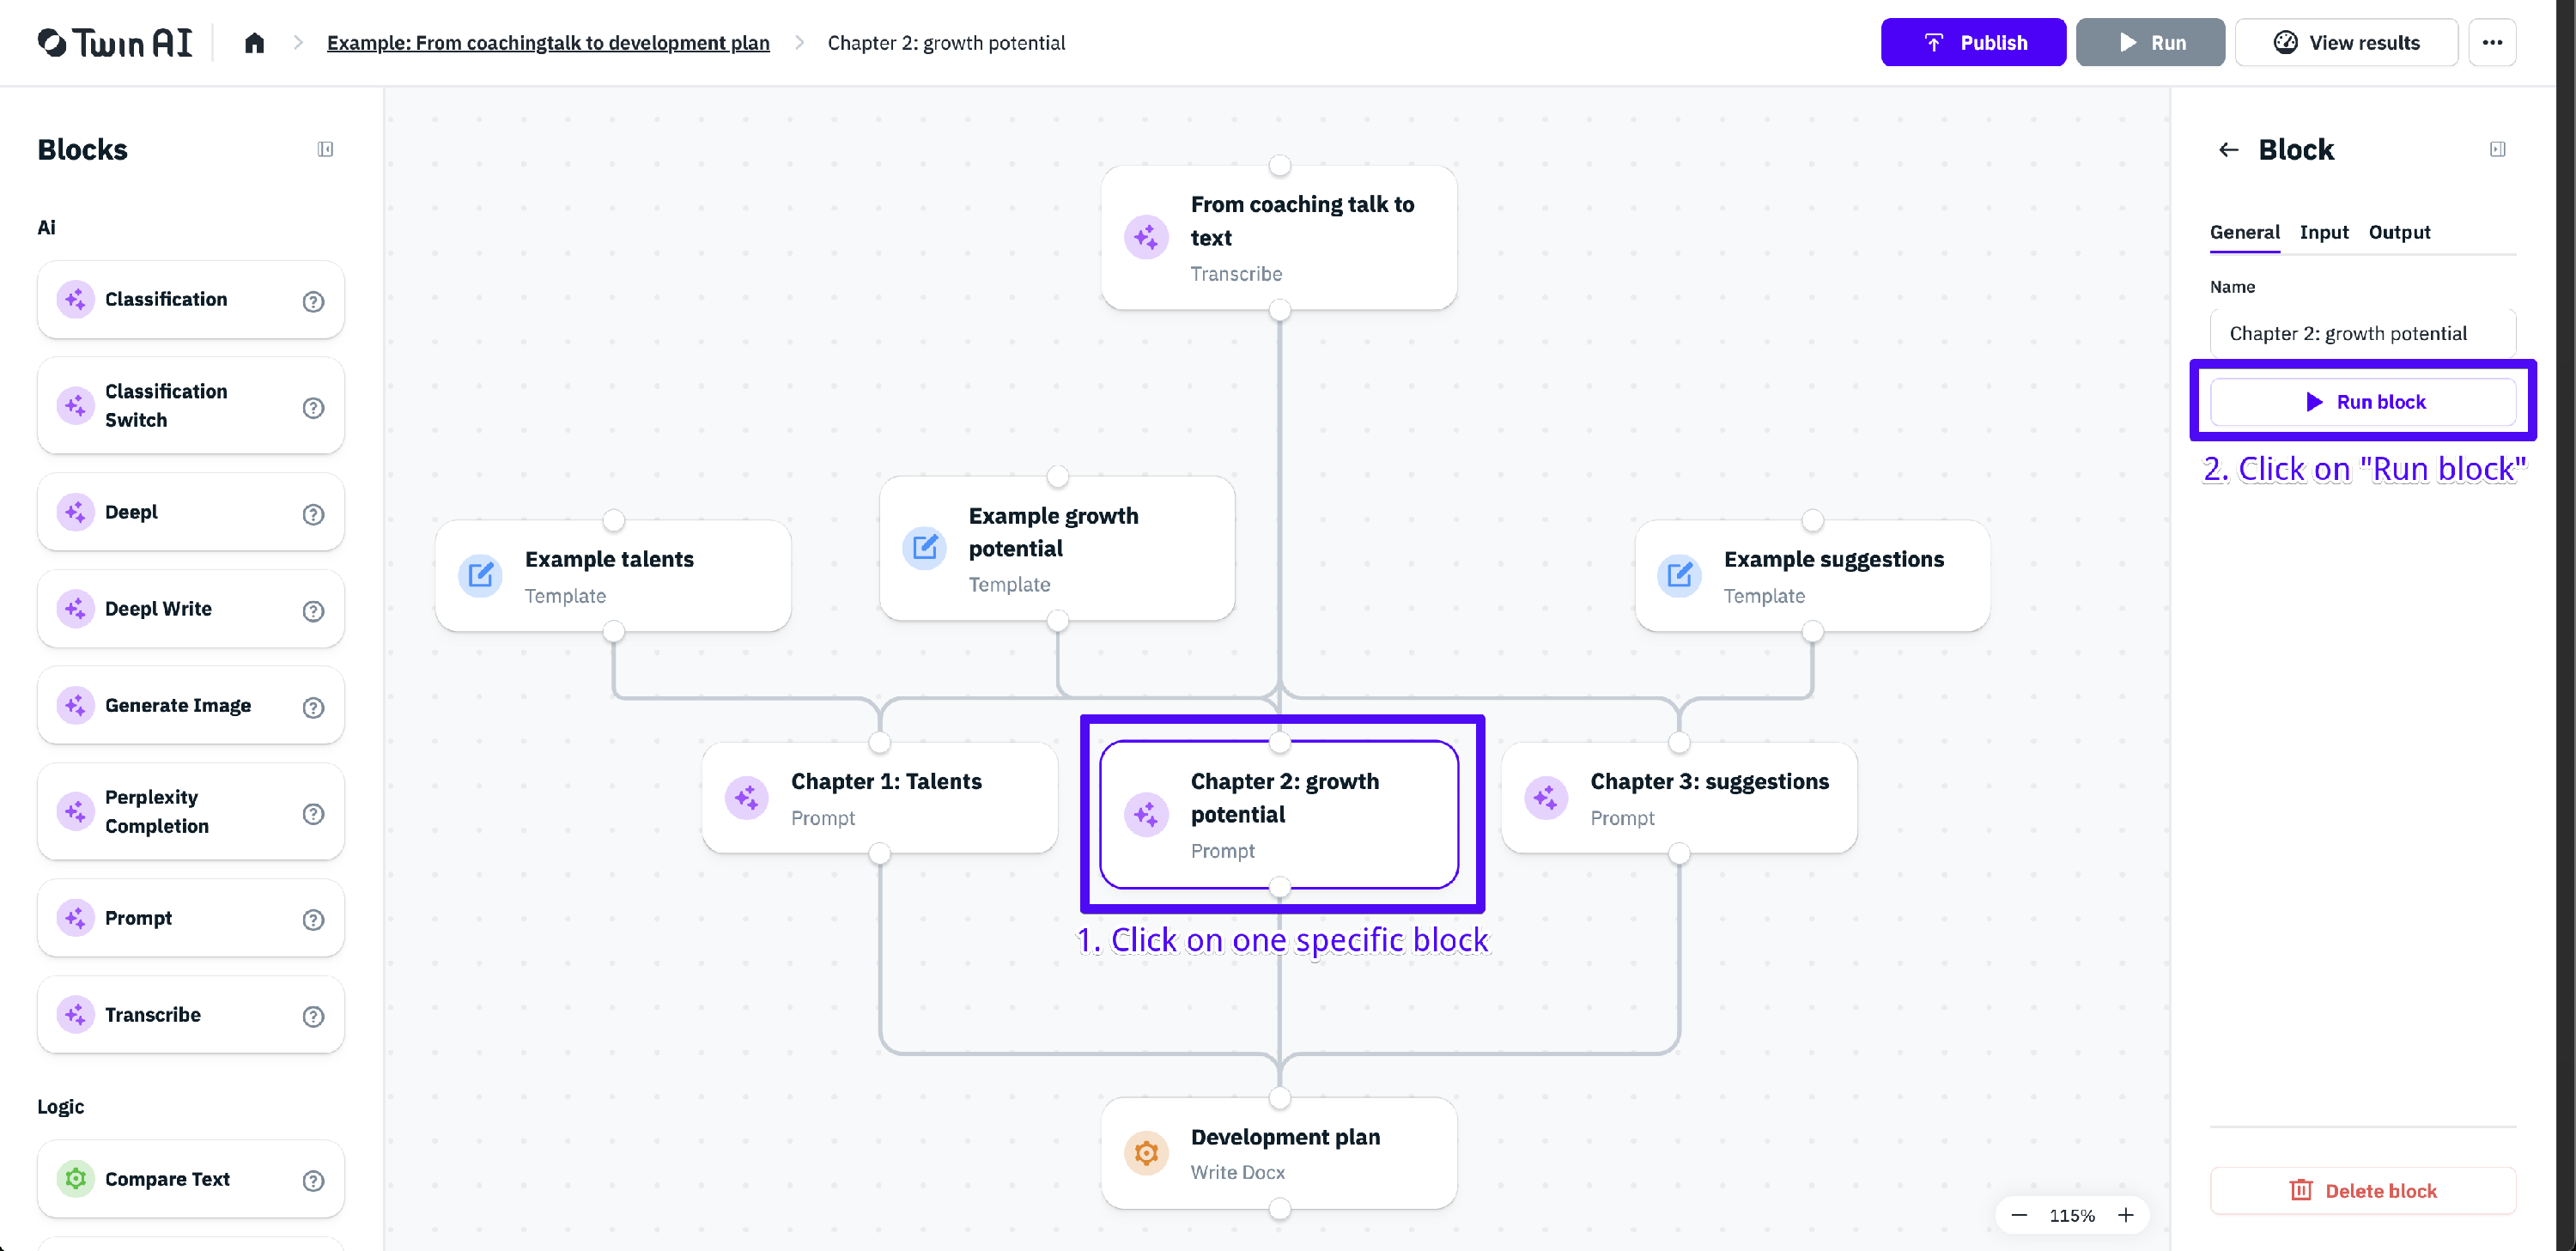
- Click on one specific block, click on the tab "output".
- Click on one specific block, click on the tab "general", and click on "Run block". See screenshot below.
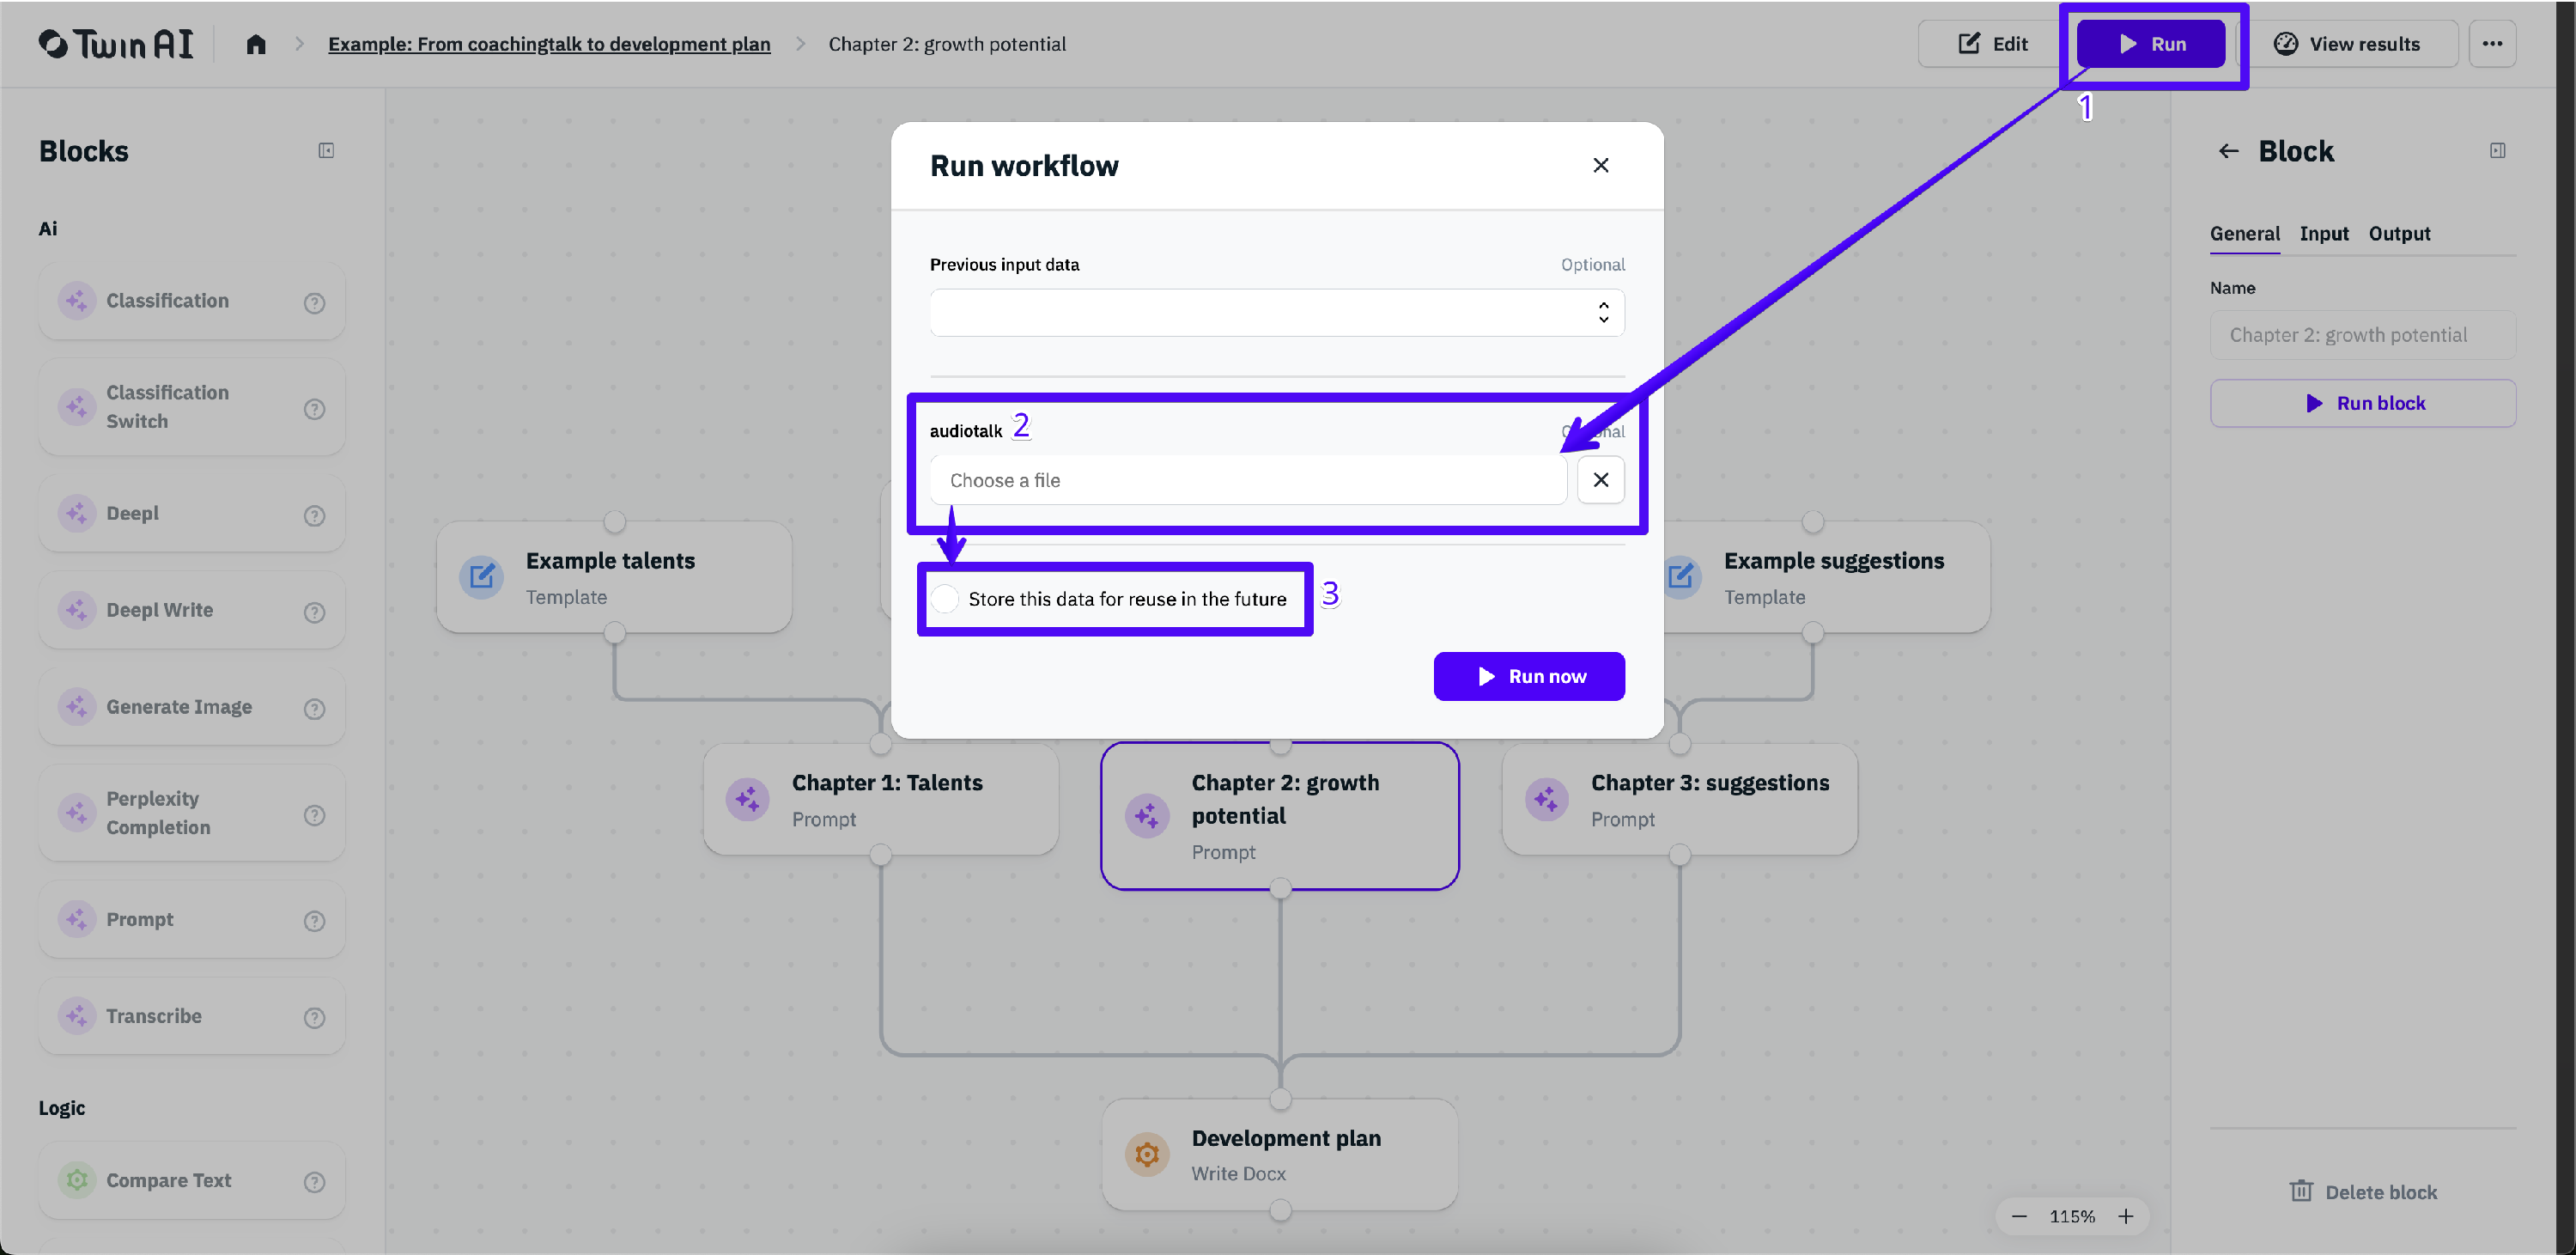
- Click on "Publish" in the top right corner, click on "Run", and wait. Or click "View results", also in the top right corner.
Saving data while testing
- When testing, store your data for future use to avoid re-uploading it every time.
Using AI models strategically
- Test different AI models. Use the latest and most powerful AI models for critical parts, and older models for simpler tasks. See what works best.
- Keep in mind that newer models take longer to run and are more expensive.
- Running individual blocks can help compare results across different models efficiently.
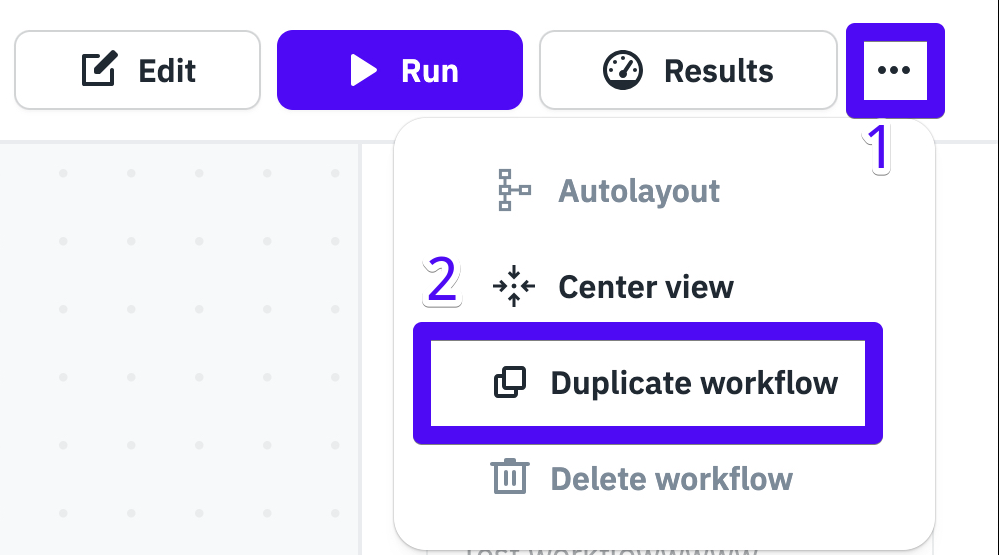
- Duplicating your workflow can help compare results across similar workflows with different models. Duplicate a workflow, select different models, check the output. Afterwards, delete the least useful workflow.
Focus on repetitive work
Twin AI can make the biggest difference in your organisation when you focus on repetitive work. That's where you can make the biggest difference, as that's probably the most time consuming. Please see the following helpdesk article to get inspired: Get inspired with workflows you can build with Twin AI.
Formatting & layout
- Formatting workflows can be tricky. Please see our separate helpdesk article for best practices on structuring layouts: Formatting Word-documents with Markdown in your workflow.
Seeking support & collaboration
- Our experienced developers are available to help with complex workflow setups. Please contact us via support@twinai.nl. We can always help you with brainstorming - free of charge!
- Like said above, build your prompts as if you're training a new colleague. Write the full process in your prompts.
- Use the right questions to refine workflows:
- What is the goal of this workflow?
- What are the key steps in the process?
- How do I explain this workflow when I'm onboarding a new colleague?
- How do I explain to the intern how this process works?
- Which end result do we want to achieve and how do we usually get there?
- What data is needed at each step?