
Quickstart: from intake to a first draft
This walk-through takes one application from the intake call to a file you can submit, in six steps.
1. Create the project
Open Projects in the left sidebar and click New project. A three-step wizard runs: Grant, Sources, Start. Every step can be skipped and filled in later.
- Grant: assign the client and pick the Document type for the scheme you are applying for. The document type is optional and can be set later. Typing a client name that does not exist yet offers to create it there and then.
- Sources: add the call text, your intake notes, an earlier application. Twin reads these before it writes a word.
- Start: decide whether Twin starts writing now or you take it from here.
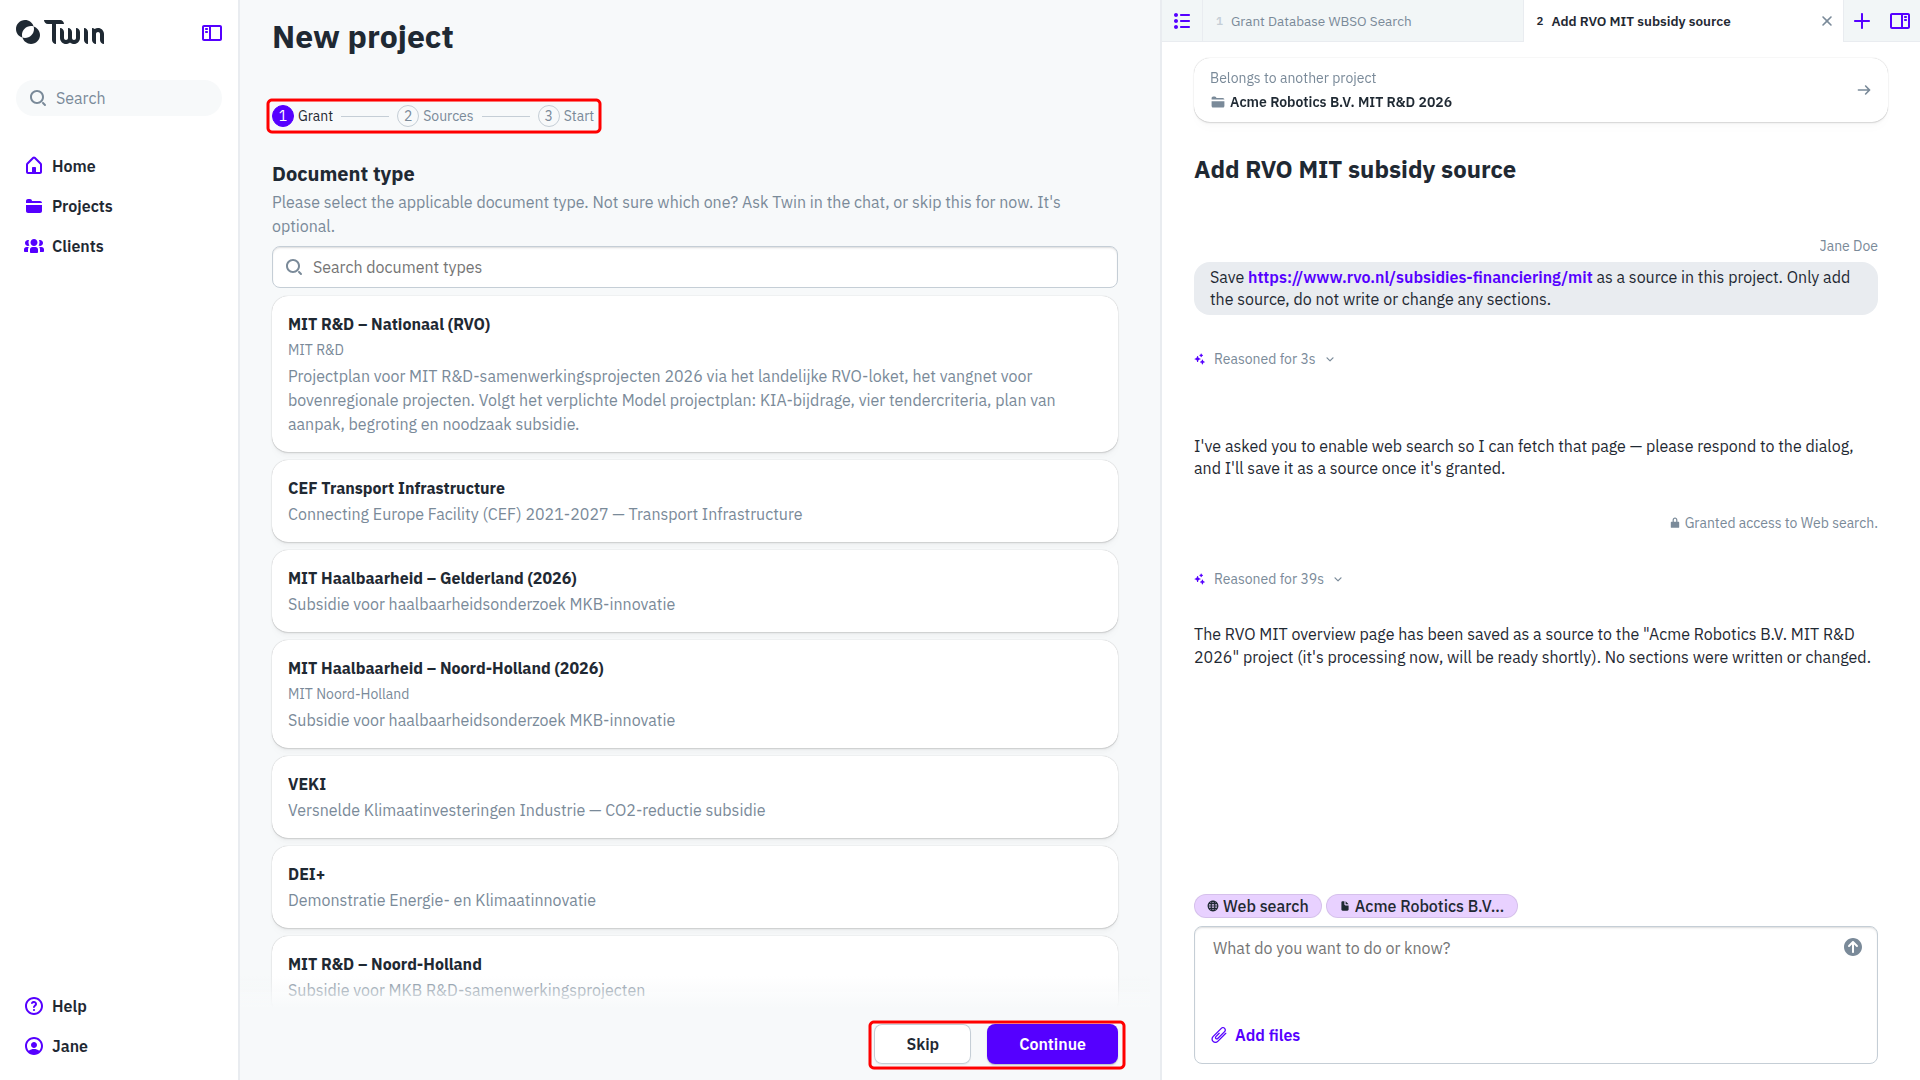
The project exists from the moment you leave the first step, so nothing is lost if you stop halfway. On the last step, Let Twin write the <document type> creates the document and hands it over; the field The core of the application is the sentence or two Twin anchors the plan and every section to. Open the project saves everything and takes you to the project page instead. See Projects: where an application comes together.
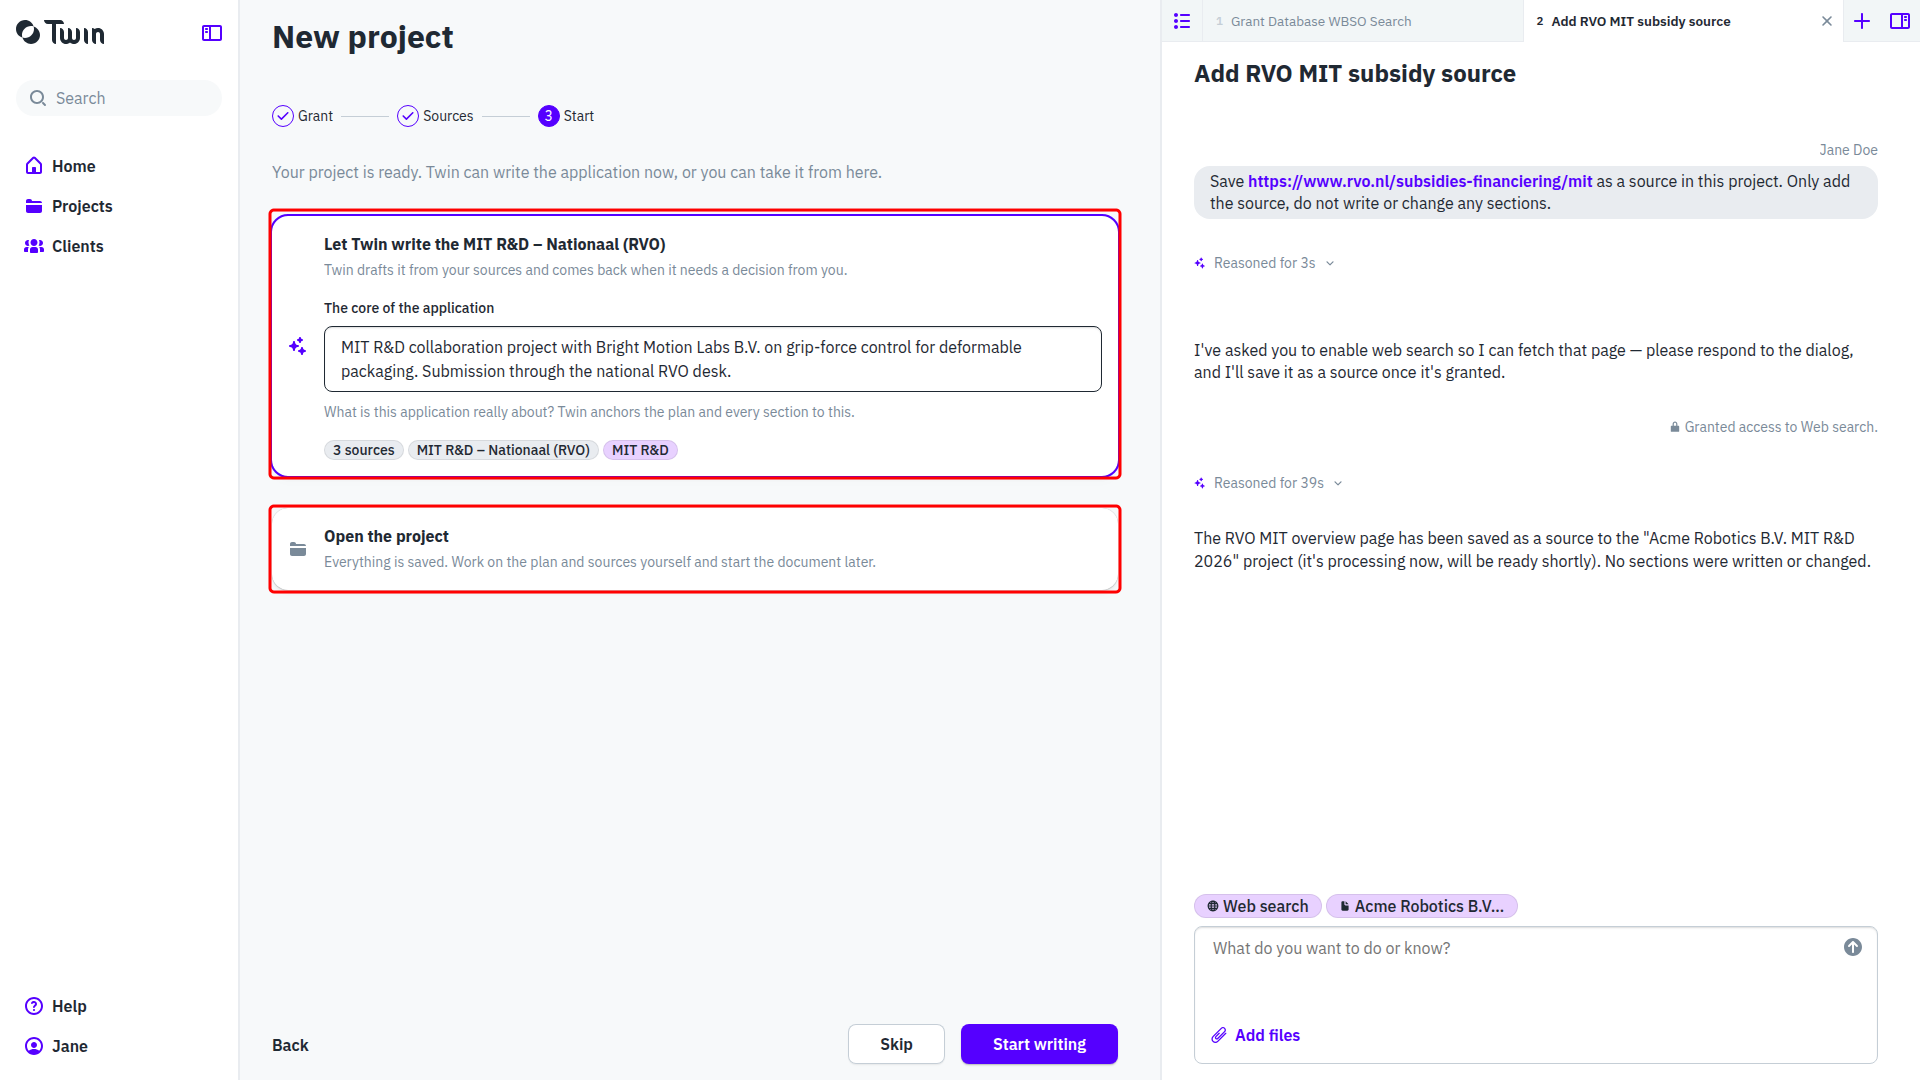
2. Look over the project page
The project page is where the application comes together: the grant, client, owner, deadline and status along the top, then Files, Tasks and Clients. Files holds the project plan card, the documents and the sources together. A deadline taken from the grant is filled in for you. Check that the right sources are there before Twin starts, and add anything that is missing with Add > Upload file or by dropping files on the page. See Sources: what Twin writes from.
3. Approve the plan
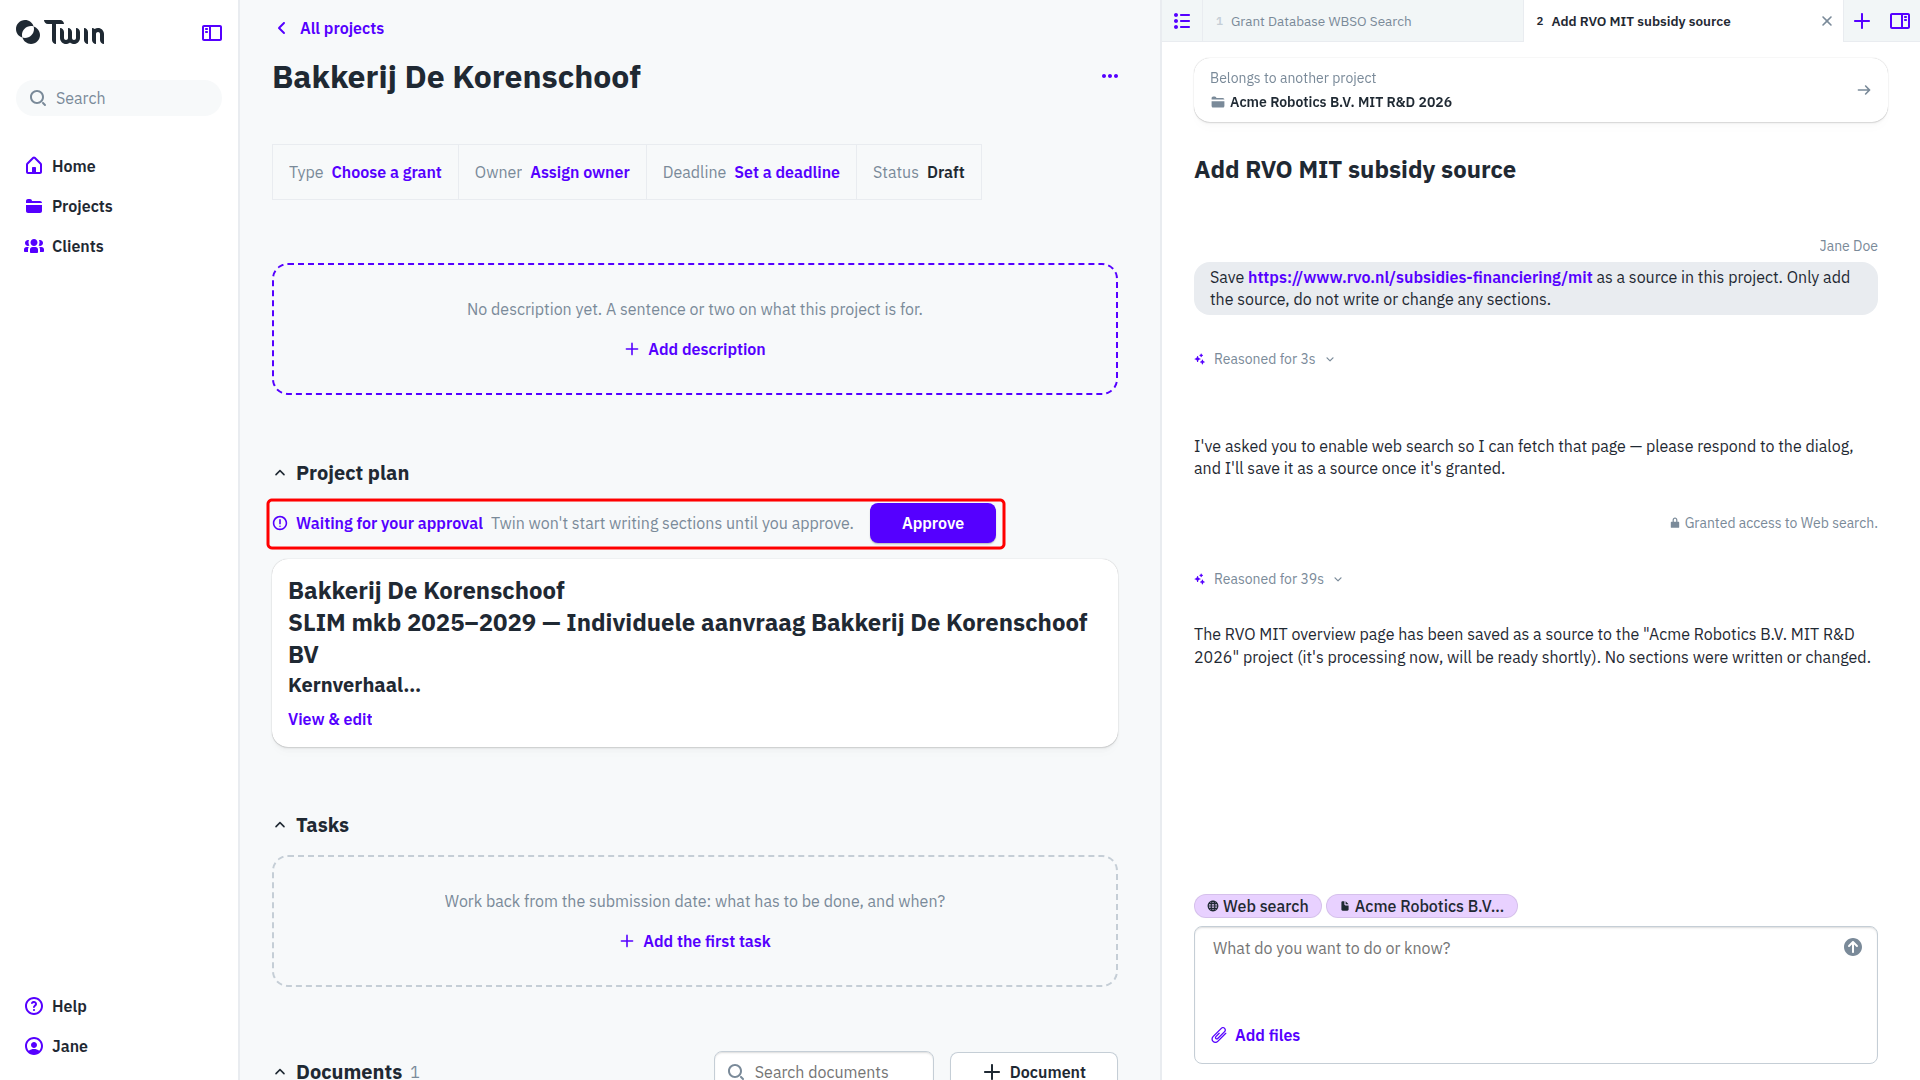
The assistant does not write the application straight away. It first drafts a project plan and stops, and the plan card in Files reads Not approved. Open the card to read the plan on the Project plan page, change anything that is off, then click Approve. The assistant asks you to confirm in the chat as well, so answer it there to let it carry on.
If you forget, Home reminds you: the project turns up under Your Projects with the reason Plan waiting for your approval.
4. Read the sections
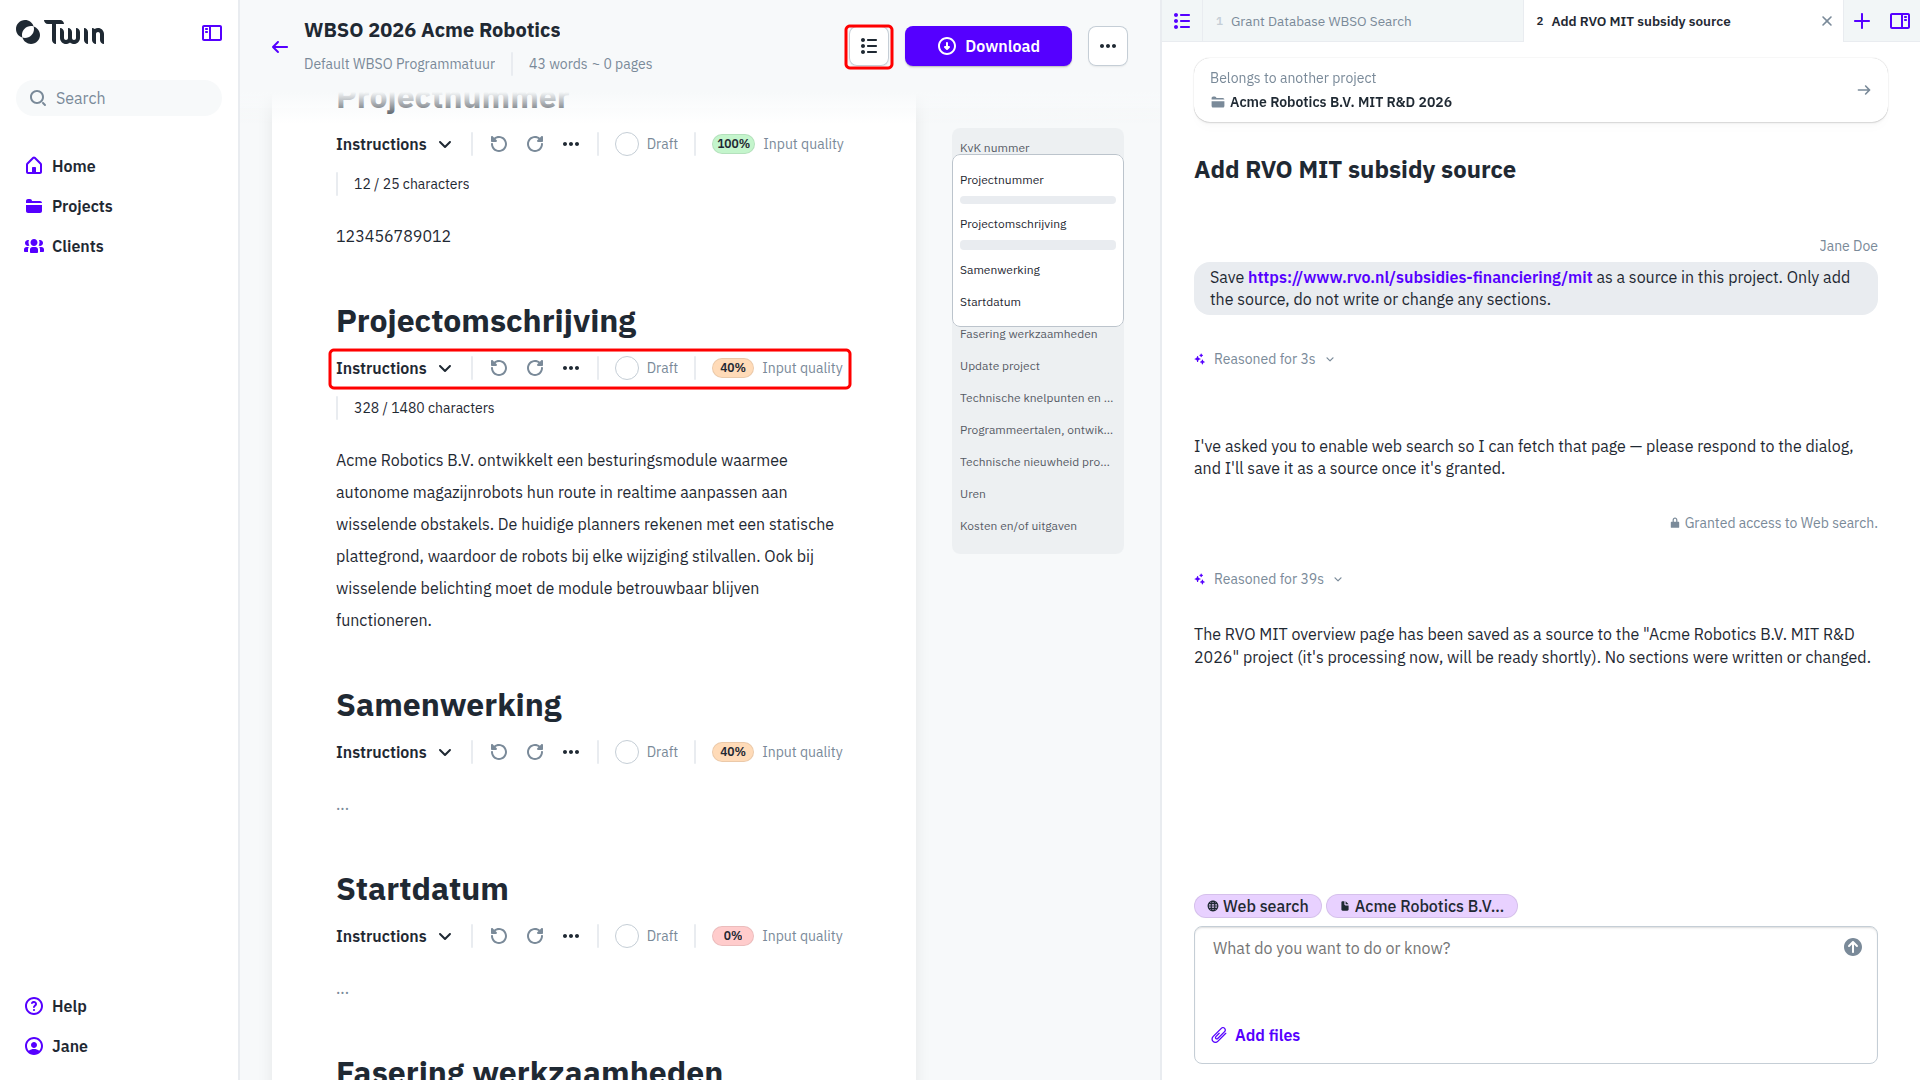
Open the document from the project's Files section. Each section carries the funder's own Instructions, a word or character count against the limit, an Input quality score and a checkbox that switches the section between Draft and Completed. The Table of contents button in the header lists every section and its input quality score. See Understanding document sections and Reviewing and editing AI-generated content.
5. Give feedback
You can type in a section yourself, but the faster route is a comment: hover over the text, click Add comment and say what is wrong or missing. The assistant reads unresolved comments the next time it works on that section, so your expertise ends up in the text instead of in a side conversation. See Giving expert feedback on a section.
6. Export
When the document is ready, click Download in the header and then Latest version. The files appear in the panel as they are generated; click a file name to save it. Which formats you get is decided by the document type, not by you. See Exporting your document.
Good to know: you can ask the assistant to do any of this instead of clicking through it. It creates projects and clients, links a grant, adds sources and writes sections, from the column on the right of every page.